Showing posts with label Fall. Show all posts

Friday, November 15, 2013

Gluten Free Apple Crumb Pie


I’m back! I didn’t mean to leave, and definitely for not this long, but it’s been a crazy past few months and blogging fell by the wayside. It started with a coworker leaving and having to cover two positions until just a few weeks ago.  All while I studied for the GMAT, took the GMAT, and applied to business school (keeping my fingers crossed!). Needless to say, I've had more fun summers. 

Oh, and I moved.  After five years in my tiny studio, I made the leap to a rowhouse on Capitol Hill. I have two awesome roommates and am SO enjoying having actual space. We have a dining room, normal-sized kitchen, working fireplace, a huge basement (hello, storage!), and a backyard. The neighborhood is perfect for me right now - more quiet and residential yet still right in the middle of everything.  There are even families here. Like, with actual small children.  We have mums on our stoop. There were trick-or-treaters on Halloween. I can't get enough. 

Speaking of my normal-sized kitchen, I’ve slowly been learning my way around, getting organized, and finding my new rhythm.  In the chaos of moving, I barely cooked for over a month. I couldn’t jump back to The Kitchen Holiday with some rushed weeknight meal, so this weekend I concocted a perfect fall, gluten free dessert. It’s not too sweet and has a nice blend of oats, nuts, and fruit, so you can, you know, eat it for breakfast (I won't pretend this didn't happen. Twice.).  

First we'll tackle the crust. Instead of a thin pastry crust, I opted for a hearty, oat-ey, almond crust.  Start by making oat flour. Pour ½ cup of gluten free oats into the food processor and blend on high until they've reached a flour consistency. 
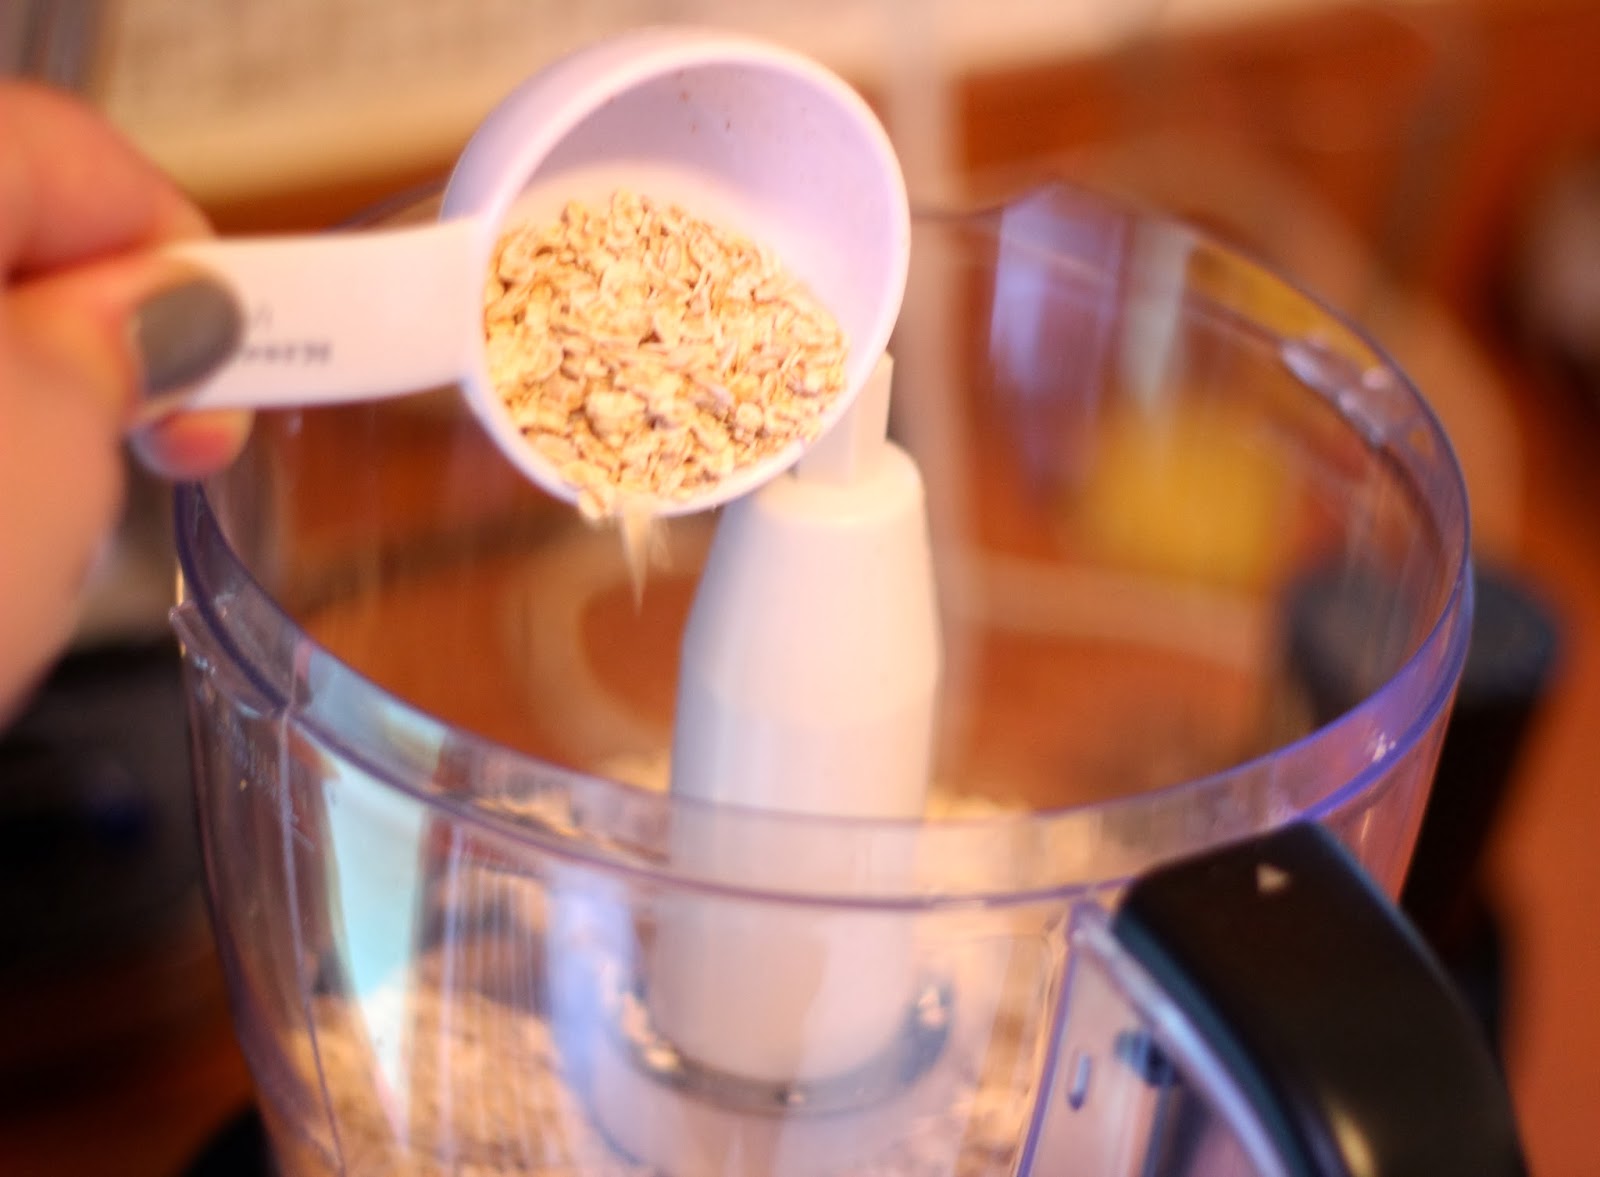


Like this:


Pour the flour into a separate bowl and prepare the other crust ingredients: coconut oil, maple syrup, oats, salt, and almonds.


Add the almonds to the food processor and blend them until they look like this:


Add the oat flour, salt, coconut oil, and maple syrup, and blend them until they stick together. 


Add the remaining oats and blend they're just combined into the "dough," but not so much that the oats are all chopped up.


Press the dough into a pie plate with your fingers. If your fingers stick to the dough, just get them a little wet. I used a shallow 9 inch pie pan because I was worried there wouldn't be enough dough, but there was more than enough. It easily would have fit into my deep dish pan.


Next we'll make the filling. We'll use 5 medium sized apples, sugar, spices, and gluten free flour (I used gluten free baking mix). My apples were left over from some that my parents grew in their yard (I'm starting to think it's closer to a homestead than a yard, actually) and some I received in my farm share over the summer. They weren't the prettiest on the outside, but once I peeled them they were just fine.


Peel and core the apples and then slice them very thinly into a large bowl.


Add the sugar, flour, and spices. I used cinnamon, nutmeg, and cloves, but you could also just use cinnamon if you prefer. 


Toss it all together and pour the fruit into our awesome shell.


Finally, we'll make the crumb topping.  I used gluten free flour, white and brown sugar, pecans, oats, salt, and butter. 


Using a pastry blender, mix all the ingredients until the butter is the size of small pebbles. It will all melt together in the oven to a crispy goodness.  If you don't have a pastry blender, you can always use two sharp knives instead. 


Pour the topping over the apples. The apples will cook down quite a bit in the oven, so don't worry about it being too high. You'll have to carefully add the topping, but it will all come together nicely. 


Bake at 400 degrees for 40-45 minutes, or until the crumb topping is golden brown and the apples are soft. As you can see, the edges of my crust got a little too brown, so I'd recommend cutting strips of foil and placing them over the edges of the crust while your pie cooks. Either way though, it will still be delicious.


Eat it right away while it's warm, possibly with a scoop of vanilla ice cream. 


The great thing about this crust is that it gets better after it sits for a while. Immediately after baking I found it to be a little on the dry side, but the next day, after all the delicious apple juices have soaked through, the pie was even better. I think this will depend on how juicy your apples were. Mine weren't very juicy, but if yours are, the crust might be perfect as soon as it comes out of the oven. Let me know how it goes!


I'll definitely be making this come Thanksgiving, but if I'm being honest I'll probably be making this continuously throughout the season. 


Gluten Free Apple Crumb Pie

Crust
¾ cups whole almonds
1 ½ cups gluten free rolled oats
¼ cup coconut oil
3 tablespoons maple syrup (or other liquid sweetener)
¼ teaspoon fine grain sea salt

Filling
4-5 medium apples
1/3 cup sugar
1 teaspoon cinnamon
½ teaspoon ground cloves
½ teaspoon nutmeg
2 tablespoons gluten free flour (such as gluten free baking mix)

Topping
½ cup gluten free baking mix
⅛ cup granulated sugar
⅛ cup brown sugar
¼ cup oats
¼ cup pecans, finely chopped
Dash of salt
¾ stick of butter, cut into pieces

For the crust
Blend ½ cup oats in a food processor until the consistency of flour. Remove to a separate bowl. Add the almonds to the food processor and blend until they resemble coarse sand. Add the oat flour, salt, oil, and syrup and blend until combined. Add the remaining one cup oats and blend until just combined. Pour into 9 inch pie pan and press into the sides. Set aside.

For the filling
Peel, core, and slice the apples. Mix in a large bowl with sugar, spices, and flour and toss until combined. Pour into prepared pie pan.

For the topping
Combine all ingredients into a medium bowl and mix with a pastry blender until the butter resembles small pebbles. Carefully pour over apples.

Cover the edges of the pie with foil. Bake at 400 degrees for about 45 minutes, or until the topping is browned and the apples are soft. Cool slightly before serving. 

Thursday, October 11, 2012

Pumpkin Walnut Muffins


If you've known me during the fall, you know that I love pumpkin.  I'll take it in my pancakes, coffee, chili, pies, and, most importantly, beer.  Like this one, which took me 3 full years to find in DC.  

There are two types of pumpkin to cook with - canned or fresh.  For canned pumpkin, I broke down and bought an enormous pack from Costco.  For fresh pumpkin, you simply bake a sugar/pie pumpkin and scoop out the flesh (more detailed instructions in this post).  You can then freeze it in 1-cup increments in small freezer bags to pull out whenever you need it.  

This year, pumpkin picking just hasn't been in the cards, so it's been canned pumpkin all the way.  Which makes it very easy to whip up a quick batch of pumpkin walnut muffins on a work night.  They make your kitchen smell like fall and are wonderful fresh or grilled in the morning.  I even had to give some away to friends so that I wouldn't eat them all myself.  

To start, melt the butter in a small bowl in the microwave and let it cool.  Completely forget to take a picture of it.  Next, prepare the walnuts by chopping them finely on a cutting board.  I made the mistake of not chopping them finely enough, which caused some of the larger pieces to burn in the oven.  I recommend chopping them quite coarsely.  Set them aside for later.


Now mix all of the dry ingredients together in a large bowl.  About the flour: The recipe calls for 1 cup white and 1 cup white whole wheat flour.  I used 1 cup white, 3/4 cup whole wheat, and 1/4 cup wheat germ.  The recipe is pretty forgiving, so use whichever flour you prefer (or whatever you have on hand).  


Now mix all the wet ingredients together, including the cooled butter.  This is why it's important to let it cool - you don't want hot butter mixed in with the egg.  Make a well in the center of the dry ingredients and pour all of the wet ingredients in, mixing well.


If you're using raisins or chopped dates, now would be the time to fold them in.  I didn't have any on hand, so I skipped them, but I think they would add a great sweetness and extra moisture.  You can't go wrong either way, though. 
Next you're going to prepare the muffin tin.  Here you have a few choices - a muffin tin lined with cupcake papers or sprayed with cooking spray, or silicone baking cups.  I used silicone baking cups and sprayed them with cooking spray.  These little guys are the greatest - they're super cute, the muffins pop right out of them after they're cooked, and they're reusable.  

  
Using a large spoon, drop enough batter into each cup to fill it almost to the top.  


Here's where the walnuts come in.  Using your fingers, sprinkle the chopped walnuts over the batter.  Press them into the batter so that they don't fall off later  


Bake them in a 400 degree oven for 20-25 minutes.  You'll know they're done when you insert a toothpick into the center and it comes out without any batter stuck to it.  Let them cool for a few minutes, then transfer them to a rack to cool even more.  


You can serve them right away when they're still warm, or they'll keep for several days in an airtight container.  You could probably wrap them well and freeze them, but I can't attest to the success of this method.  They're best enjoyed with a hot cup of coffee or a cold glass of milk.  Happy fall!


Pumpkin Walnut Muffins
Adapted from Gourmet
Yield: 12 muffins

Ingredients
1/2 cup unsalted butter
3/4 cup cooked pumpkin (canned or fresh)
1/4 cup milk or buttermilk
2 large eggs
3 Tablespoons unsulfured molasses
1 teaspoon vanilla
1 cup flour
1 cup white whole wheat flour, all-purpose flour, or your flour of choice
1 1/2 teaspoons baking powder
1 teaspoon cinnamon
1/2 teaspoon ground ginger
1/4 teaspoon ground cloves
1/8 teaspoon grated nutmeg
1/2 teaspoon salt
1/4 teaspoon baking soda
3/4 cup packed brown sugar
3/4 cup chopped pitted dates or chopped raisins (optional)
3/4 cup finely chopped walnuts

Preheat oven to 400 degrees.  In a small bowl, melt the butter and set aside to cool.

In a large bowl, mix together the flours, baking powder, cinnamon, ginger, cloves, nutmeg, salt, baking soda, and brown sugar.  In a smaller bowl, mix together the butter, pumpkin, milk, eggs, molasses, and vanilla.  Make a well in the dry ingredients and pour the wet ingredients in.  Mix until well incorporated, then fold in the dates.  

Prepare muffin tins using paper liners or cooking spray.  Drop spoonfuls of batter into each cup to fill them approximately 3/4 high.  Sprinkle walnuts over the batter, pressing them in so that they stick.  Bake at 400 degrees for 20-25 minutes or until a toothpick inserted in the center of a muffin comes out clean.  Cool for several minutes before removing from the muffin tin.  

Tuesday, October 9, 2012

Happy Trails Adventure Cookies


I originally made these cookies over the summer for a day of white water rafting and stand up paddleboarding.  It was obviously going to be the most adventurous day of the season (I mean, we did a ropes course that was 65 feet high), so I wanted to bring a snack that was not only delicious, but would provide lots of energy and keep us going (and not falling) for a while.  

Angela's Happy Trails Adventure Cookies were the perfect recipe.  They're pretty healthy as far as cookies go - no added oil and mostly vegan - and are packed with nuts and seeds that would provide lots of protein and nutrients.  Plus, using gluten free oats would make them gluten free.  They were fairly quick and easy to make, so it left me just enough time to get my packing done for the trip.  

While it might not be water sports weather any longer, I still wanted to share this recipe because they'd be great for lots of outdoor fall activities that are sure to be on your calendar soon.  Like pumpkin picking and hiking!  Here, a few pictures from a trip to Harpers Ferry, WV last fall. And yes, I think they'd be perfect for a few miles on the AT!


Happy Trails Adventure Cookies
Adapted from Oh She Glows
Yield: 14-16 cookies

Ingredients
1 cup walnuts
1 cup + 1 Tablespoon oat flour (blended rolled oats)
1/4 cup + 2 Tablespoons rolled oats
1/2 teaspoon cinnamon
1/2 teaspoon fine grain sea salt
1/2 teaspoon baking soda
1 Tablespoon ground flax seed
1/4 cup maple syrup
3 Tablespoons honey
1/2 Tablespoon vanilla extract
1/3 cup dried sweetened cranberries
3 Tablespoons pepita (pumpkin) seeds
3-4 Tablespoons chocolate chips

Prepare the walnuts: Toast the walnuts on a baking sheet at 325 degrees for 6-8 minutes, stirring once.  Allow them to cool for several minutes.  Chop them in a food processor (or by hand) until they resemble small crumbs.  Set aside.

Increase the oven temperature to 350 degrees.  In a large bowl, mix the oat flour, rolled oats, cinnamon, salt, baking soda, and ground flax seed.  In a smaller bowl, combine the syrup, honey, and vanilla.  Pour the wet ingredients into the dry ingredients and mix well.  Fold in the cranberries, pepitas, and chocolate chips.  

Form the cookies with wet hands (dip them in water frequently to avoid the dough sticking to your hand) using approximately 2 Tablespoons of dough.  Firmly squeeze the dough together and place on a greased cookie sheet.  Bake at 350 degrees for 10-12 minutes, or until cookies begin to brown and are set.  

Can be stored in an airtight container for several days, if they last that long.  


Wednesday, October 3, 2012

African Curried Coconut Soup


I'm back!  After taking a pretty lengthy hiatus from The Kitchen Holiday, I'm happy to report that I'm back in the kitchen and ready to share some new recipes.  Since June, my summer got pretty hectic with lots of travel, work, and studying for the GMATs (so glad those are over!), that I just didn't have time to take any pretty photos or get any non-business themed writing done.  Now that things have settled down to a dull roar, I'm so excited to be back in this space and to share some new food ideas with you!  

Since we skipped right over the second half of summer and have reached the official beginning of fall, I've found myself craving warm, comfort food.  Sure, maybe it's still 80 degrees outside some days and I may or may not have worn shorts this weekend, but despite all that, my body is recognizing the change in the air and is ready to quiet down and embrace the season.  

To ease into autumn, I found a new soup that's light enough to be appropriate for this in-between time of the year.  This African Coconut Curried Soup is full of flavor, packs a little kick, and is satisfying with hearty chickpeas and brown rice.  Plus, it's gluten free and vegan.  I made a big batch on a Sunday so that I had leftovers to eat for lunch throughout the week, and it tasted great reheated.

To start, cook the rice.  You can use white or brown, whichever is your preference.  You could probably even substitute some other kind of grain if you wanted to, like barley or quinoa.  In a small saucepan, combine 1/2 cup of rice and 1 cup of water.  Bring it to a boil, then lower the heat and simmer for 30-40 minutes for brown rice, or 20 minutes for white rice.  Fluff the rice with a fork and set aside.


Next, prepare the vegetables.  Finely chop the onion, seed and chop the bell pepper, and, *very important*, remove all the seeds and the white flesh from the hot pepper and then finely dice it.  I don't handle spicy food very well, so I wanted to make sure the hot pepper was diced pretty small so that I didn't get any surprise spicy bites!


Now you're ready to actually make some soup!  In a large pot, heat the canola oil over medium heat.  Add the peppers and onion and cook them for about 5 minutes, or until they're soft.

While the vegetables are cooking, peel and chop the garlic.  


Add the garlic to the vegetables and cook for one minute longer.  

Now for the easy part - you just need to throw the majority of the remaining ingredients into the pot.  Add vegetable broth, chickpeas, a can of diced tomatoes, curry powder, salt, and pepper.  Stir it all together, then increase the heat to bring it to a boil.  Once it boils, turn the heat down to low, cover, and simmer for 10 minutes.  


After the 10 minutes are up, add the coconut milk and rice.  The recipe calls for you to wait to add these ingredients since coconut milk can separate if you boil it, and you don't want the rice to overcook.  That being said, I totally screwed that up and boiled the coconut milk and everything was fine, so don't sweat it.  It sure does look pretty though!


Stir everything together, cover it again, and heat over low to medium heat for 5-10 minutes longer.  You can serve the soup immediately, but it also tastes great as leftovers, as I can attest to after eating it for lunch for 4 days in a row.  It's also freezable, if you want to have some variety in your week.  Your choice!  

Enjoy, and sit back as the weather starts to get colder!


African Curried Coconut Soup
Adapted from The Tropical Vegan Kitchen
Yield: 4 servings

Ingredients
2 Tablespoons canola oil
1 medium onion, chopped
1 medium red bell pepper, chopped
1 hot pepper (jalapeno or similar), seeded and finely chopped
2 cloves garlic, peeled and finely chopped
2 cups low-sodium vegetable broth
1 15-ounce can chickpeas, rinsed and drained
1 cup diced tomatoes (canned or fresh)
1 teaspoon curry powder
1/2 teaspoon salt
Ground black pepper to taste
1 14-ounce can light coconut milk
1/2 cup rice (white or brown)

Cook the rice according to instructions and set aside.

In a large pot, heat canola oil over medium heat.  Add the onion, bell pepper, and hot pepper and cook until softened, about 5 minutes.  Add the garlic and cook for 1 minute longer.  

Add the vegetable broth, chickpeas, tomatoes, and spices into the pot and bring to a boil.  Lower heat and simmer for 10 minutes.  Add the coconut milk and rice and cook over medium heat for 10-15 minutes longer, avoiding bringing the soup to a boil.  

Serve immediately, refrigerate in an airtight container for 3-4 days, or freeze for several months.  

Wednesday, November 30, 2011

Silky Smooth Pumpkin Pie

I hope everyone had a yummy Thanksgiving.  If you're anything like me, you've had more than your fill of turkey, stuffing, cranberry sauce, and, of course, lots and lots of pie.  After one "Friendsgiving" here in DC, Thanksgiving in Connecticut, and one more "Friendsgiving" to go (which I get to host!), I'll have, in total, made this pie four times this year.  
CT Thanksgiving
And it's worth it every time!  This is no normal pumpkin pie.  This is the pumpkin pie that people who don't even like pumpkin pie will ask you to make over and over again.  This pie totes not just pumpkin, but candied yams.  Maple syrup, fresh ginger, and lots of cream combine for the perfect flavor combination that hint of cold weather, falling leaves, and, dare I say it, snow. 

My favorite way to make silky smooth pumpkin pie is from scratch.  As in, from a real pumpkin!  I'm just waiting for the day when I no longer live in a tiny studio apartment and have a yard in which to grow pumpkins.  Then this will really be from scratch.  Until then, Whole Foods will have to suffice.  (And when I'm crunched for time, canned pumpkin always works too.)  Make sure you get a sugar pumpkin.  Cut it in half and scoop out the seeds.  Save them for roasting later! Bake on a greased cookie sheet, cut side down, in a 350 degree oven for about an hour, or until they give way easily to a fork stuck through the skin.  


Once baked through, let the pumpkin cool just enough so that you can touch it.  Scoop the pulp out with a spoon and mash with a potato masher (or run through a food processor).  


Next, make the crust.  In a large mixing bowl, mix together flour and salt.  Slice the butter into pieces and cut into flour mixture with a pastry blender until it resembles coarse crumbs.  Make sure the butter is COLD!  It's also important to leave small bits of butter in the flour - this will help the crust be flaky.  All of this can be done in a food processor if you prefer.


Working in sections, gently mix in ice water with a fork until it forms a ball of dough.  Try not to overwork the dough.  On a well floured surface, roll the dough out with a rolling pin to form a circle large enough for your pie pan.


Transfer to pie pan, trim any excess from the edges, and fold the edges under.  Using your thumb and forefingers, crimp the edges.


Refrigerate dough for 15 minutes.  Remove from fridge, line with foil, and fill with pie weights (Who really has pie weights though?  Coins work just as well.  Multi-purpose laundry quarters!) Bake at 400 degrees for 15 minutes. Remove weights and foil and bake for 10 minutes longer, or until golden brown.  

Next, make the filling.  In a large mixing bowl, beat together eggs and egg yolks.  Whisk in the half & half and vanilla and set aside. 


In a large saucepan, mix together the pumpkin, yams, sugar, maple syrup, ginger, cinnamon, nutmeg, and salt.  I mash the yams with a fork before adding them.  Stirring frequently, bring to a sputtering boil over medium-high heat.  And by sputtering, I really mean bubbly!  Don't be shy about getting this concoction to really boil.  Continue to cook, stirring constantly, until the mixture is thick and shiny, about 15 minutes.


Once the pumpkin mixture is cooked, whisk in the cream mixture until combined.


Next, strain the mixture through a fine mesh strainer.  This seems tedious at first, but this is where the silky aspect of the pie comes in.  It's a little more work, but TOTALLY worth it!  

Once strained, re-whisk filling and pour into pre-baked crust.  Place pie on a cookie sheet and bake at 400 degrees for 10 minutes.  Turn oven down to 300 degrees and bake for 20-35 minutes longer, or until the edges are set.  

Here's one of the tricks to this pie: the center doesn't have to be set when you take it out of the oven, only the edges.  The pie continues to cook from the residual heat, so it's important to let it cool at room temperature for several hours.  I'd recommend 4-5 hours, but you can get away with fewer if you have to.


Serve with whipped cream and prepare yourself for the requests to make this pie for your friends to start pouring in!


Silky Smooth Pumpkin Pie
Filling recipe from smittenkitchen.com, where it was adapted from Cooks Illustrated
Crust recipe adapted from Better Homes and Gardens New Cook Book

Makes one 8" or 9" pie.

Crust 
1 1/4 cups flour
1/2 teaspoon salt
1/3 cup COLD butter
4-6 Tablespoons cold water


Filling
2 cups half and half (or 1 cup heavy cream and 1 cup whole milk)
3 eggs plus 2 egg yolks
1 teaspoon vanilla extract
2 cups pumpkin puree* (or 1 15-ounce can) 
1 cup drained candied yams from 15-ounce can (regular canned yams can be substituted)
3/4 cup sugar
1/4 cup maple syrup
2 teaspoons grated fresh ginger 
1/2 teaspoon ground cinnamon
1/2 teaspoon ground nutmeg
1 teaspoon salt


For the Pumpkin Puree

Bake a sugar (pie) pumpkin:
  • Cut the pumpkin in half and scoop out the seeds
  • Bake cut side down on a greased baking sheet at 350 degrees for 45-60 minutes, or until a fork can be stuck through the pumpkin easily
  • Cool slightly, then scoop out pulp 
  • Mash pulp with a potato masher or run though a food processor until smooth
For the Crust
  • Mix together flour and salt in large mixing bowl
  • With a pastry blender, cut in butter until it resembles coarse crumbs (leaving clumps of butter)
  • Add 3 Tablespoons cold water and mix gently
  • One Tablespoon at a time, mix in additional cold water until the dough is moistened and forms a ball
  • On a well floured surface, roll the dough out with a rolling pin to form a circle big enough to fit into pie pan
  • Transfer to pie pan, trim the edges, fold extra dough under, and crimp the edges with thumb and forefingers or a fork
  • Refrigerate for 15 minutes
  • Remove dough from refrigerator, line with foil, and fill with pie weights (or coins)
  • Bake at 400 degrees for 15 minutes. Remove foil and weights and bake for 10 more minutes, or until golden brown
For the Filling
  • In a medium mixing bowl, beat eggs and egg yolks.  Whisk in half and half (or cream and milk) and vanilla. Set aside.
  • In a large saucepan, mix together pumpkin, yams (mash with a fork prior to adding), sugar, maple syrup, ginger, cinnamon, nutmeg, and salt.  
  • Cook over medium heat until it comes to a sputtering boil, stirring frequently.
  • Continue to simmer, stirring constantly, for 10-15 minutes, until the mixture is thickened and shiny.
  • Remove from heat and stir in egg mixture.
  • Pour combined mixture through a fine mesh strainer.
  • Re-mix strained mixture and pour into pre-baked pie crust.
  • Bake pie on a cookie sheet at 400 degrees for 10 minutes.
  • Reduce heat to 300 degrees and bake for 20-35 minutes longer, until edges are set.
  • Cool at room temperature for several hours (pie continues to bake and sets as it cools).
  • Serve with fresh whipped cream.
 
site design by designer blogs