Showing posts with label Thanksgiving. Show all posts

Tuesday, November 26, 2013

Simple Cranberry Sauce


For years, I was a fanatic of store-bought, canned, cranberry sauce.  The more it was shaped like a can, the better.  I tried whole-berry sauce on Thanksgiving when I was about 8 years old and knew that it wasn't for me.  Not surprisingly, I've come along way since 1993.  

I never realized this before, but homemade cranberry sauce is incredibly easy and simple.  I made it last weekend for Friendsgiving before heading to Connecticut for real Thanksgiving, and it was a hit. Of course, I don't have a single picture of the actual event to share with you, because I was so busy running around getting dinner ready for 13 people. Dinner itself was great - we had a fire in my new fireplace and everyone chipped in with some really phenomenal dishes. We really outdid ourselves, if I do say so myself. 

Luckily, I was able to capture a few snapshots of the actual cooking process though, so here we go: 

First, rinse one bag of cranberries in a colander.  As you're rinsing, pick through them and discard any that are gross. You know, mushy, wrinkly, discolored. Drain the good ones and set  them aside.


In a medium saucepan, combine the water and sugar and bring it to a boil, stirring constantly (sugar burns easily!).  Stir until all the sugar is dissolved, then add the cranberries.


Simmer the cranberries for 10 - 12 minutes, until all the cranberries have popped.  You can actually hear and see them splitting!  I highly recommend an apron at this point, and maybe wear an oven mitt on your stirring hand. Exploding cranberries are hot. 


The cranberries will split, get all foamy, and then become a nice sauce. Once you have achieved a thick, smooth mixture, remove it from the heat.  Keep in mind that the sauce will thicken as it cools, so it's OK if it's a little on the watery side.  Stir in the orange zest.  Pour it all into a pretty bowl and let it cool. Serve it at room temperature. 


Simple Cranberry Sauce
Adapted from Gourmet, November 1999
Serves 6-8

1 cup water
1 cup sugar
12-oz bag fresh or frozen cranberries (3 cups)
1/2 teaspoon freshly grated orange zest

1. Thoroughly rinse, drain, and pick over the cranberries.  Set aside. 

2. In a medium saucepan, combine the water and sugar.  Bring to a boil, stirring constantly until sugar is dissolved. 

3. Add the cranberries and simmer for 10 - 12 minutes, or until all of the cranberries have popped, forming a smooth, red sauce.  Stir in the orange zest.

Serve at room temperature, or chill for a more gelatinous sauce.  

Friday, November 15, 2013

Gluten Free Apple Crumb Pie


I’m back! I didn’t mean to leave, and definitely for not this long, but it’s been a crazy past few months and blogging fell by the wayside. It started with a coworker leaving and having to cover two positions until just a few weeks ago.  All while I studied for the GMAT, took the GMAT, and applied to business school (keeping my fingers crossed!). Needless to say, I've had more fun summers. 

Oh, and I moved.  After five years in my tiny studio, I made the leap to a rowhouse on Capitol Hill. I have two awesome roommates and am SO enjoying having actual space. We have a dining room, normal-sized kitchen, working fireplace, a huge basement (hello, storage!), and a backyard. The neighborhood is perfect for me right now - more quiet and residential yet still right in the middle of everything.  There are even families here. Like, with actual small children.  We have mums on our stoop. There were trick-or-treaters on Halloween. I can't get enough. 

Speaking of my normal-sized kitchen, I’ve slowly been learning my way around, getting organized, and finding my new rhythm.  In the chaos of moving, I barely cooked for over a month. I couldn’t jump back to The Kitchen Holiday with some rushed weeknight meal, so this weekend I concocted a perfect fall, gluten free dessert. It’s not too sweet and has a nice blend of oats, nuts, and fruit, so you can, you know, eat it for breakfast (I won't pretend this didn't happen. Twice.).  

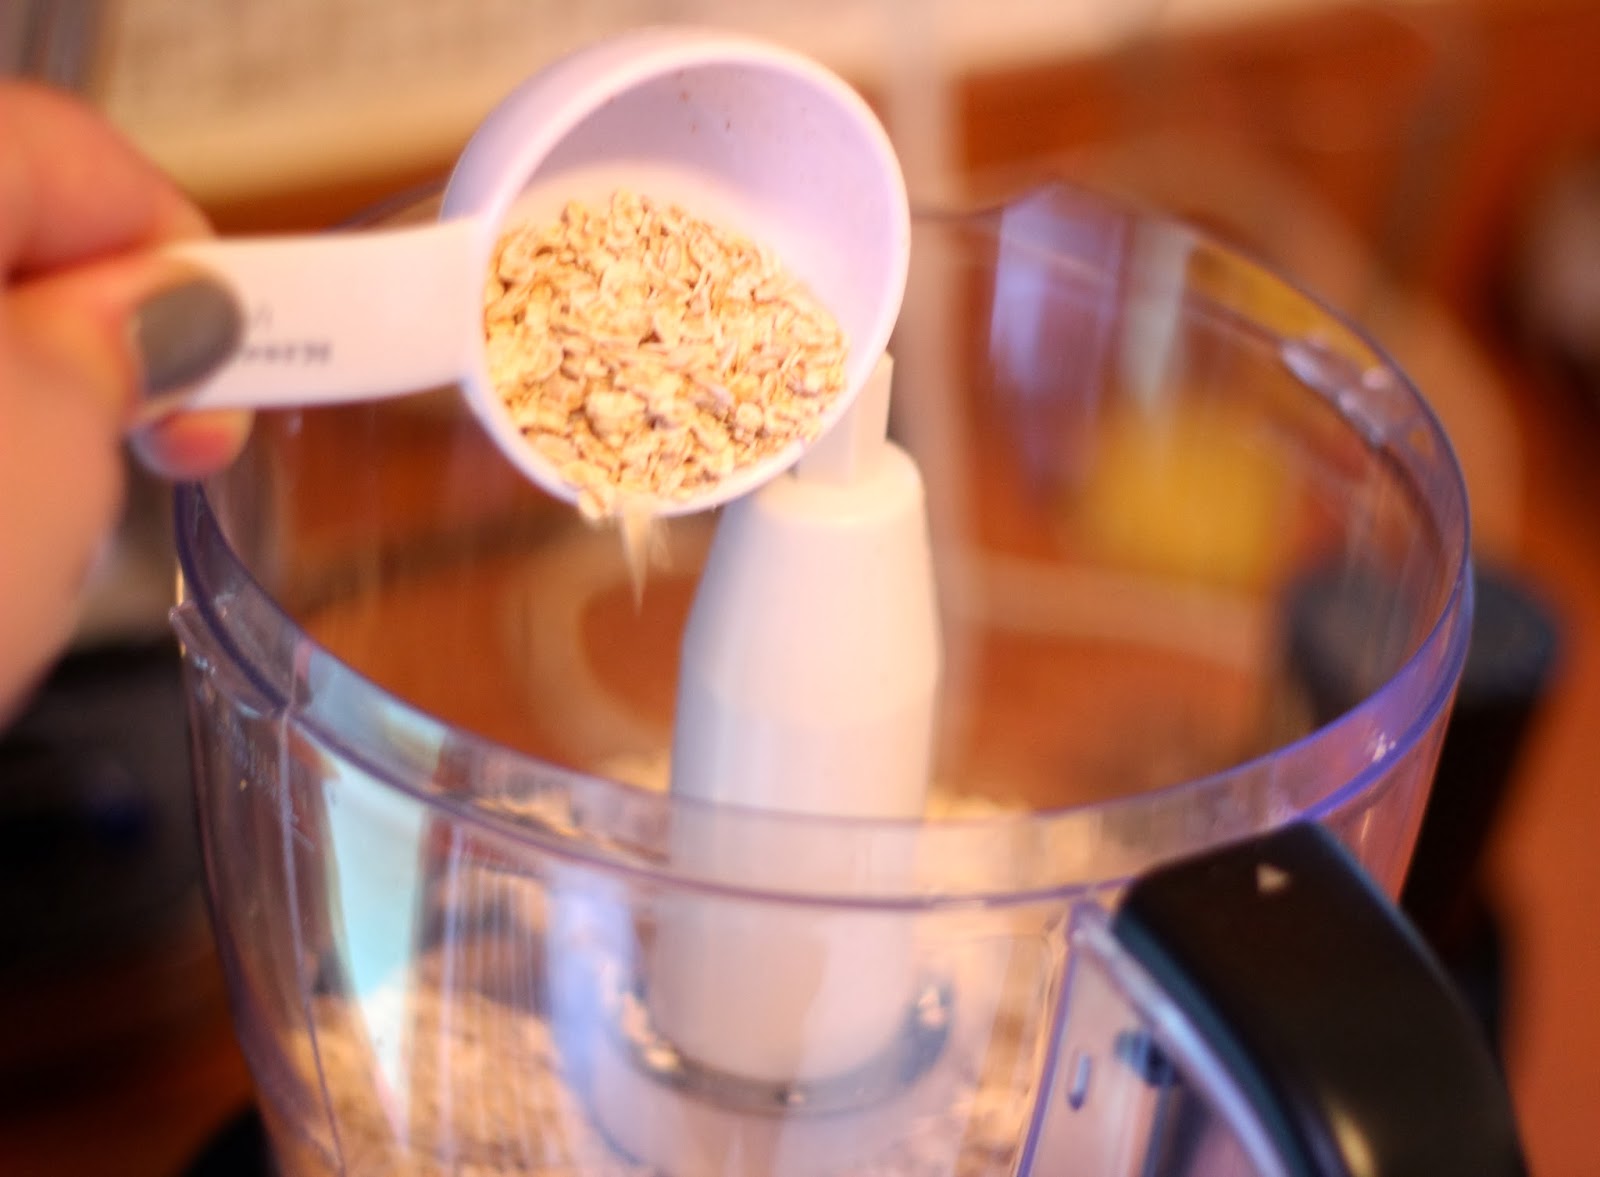
First we'll tackle the crust. Instead of a thin pastry crust, I opted for a hearty, oat-ey, almond crust.  Start by making oat flour. Pour ½ cup of gluten free oats into the food processor and blend on high until they've reached a flour consistency. 


Like this:


Pour the flour into a separate bowl and prepare the other crust ingredients: coconut oil, maple syrup, oats, salt, and almonds.


Add the almonds to the food processor and blend them until they look like this:


Add the oat flour, salt, coconut oil, and maple syrup, and blend them until they stick together. 


Add the remaining oats and blend they're just combined into the "dough," but not so much that the oats are all chopped up.


Press the dough into a pie plate with your fingers. If your fingers stick to the dough, just get them a little wet. I used a shallow 9 inch pie pan because I was worried there wouldn't be enough dough, but there was more than enough. It easily would have fit into my deep dish pan.


Next we'll make the filling. We'll use 5 medium sized apples, sugar, spices, and gluten free flour (I used gluten free baking mix). My apples were left over from some that my parents grew in their yard (I'm starting to think it's closer to a homestead than a yard, actually) and some I received in my farm share over the summer. They weren't the prettiest on the outside, but once I peeled them they were just fine.


Peel and core the apples and then slice them very thinly into a large bowl.


Add the sugar, flour, and spices. I used cinnamon, nutmeg, and cloves, but you could also just use cinnamon if you prefer. 


Toss it all together and pour the fruit into our awesome shell.


Finally, we'll make the crumb topping.  I used gluten free flour, white and brown sugar, pecans, oats, salt, and butter. 


Using a pastry blender, mix all the ingredients until the butter is the size of small pebbles. It will all melt together in the oven to a crispy goodness.  If you don't have a pastry blender, you can always use two sharp knives instead. 


Pour the topping over the apples. The apples will cook down quite a bit in the oven, so don't worry about it being too high. You'll have to carefully add the topping, but it will all come together nicely. 


Bake at 400 degrees for 40-45 minutes, or until the crumb topping is golden brown and the apples are soft. As you can see, the edges of my crust got a little too brown, so I'd recommend cutting strips of foil and placing them over the edges of the crust while your pie cooks. Either way though, it will still be delicious.


Eat it right away while it's warm, possibly with a scoop of vanilla ice cream. 


The great thing about this crust is that it gets better after it sits for a while. Immediately after baking I found it to be a little on the dry side, but the next day, after all the delicious apple juices have soaked through, the pie was even better. I think this will depend on how juicy your apples were. Mine weren't very juicy, but if yours are, the crust might be perfect as soon as it comes out of the oven. Let me know how it goes!


I'll definitely be making this come Thanksgiving, but if I'm being honest I'll probably be making this continuously throughout the season. 


Gluten Free Apple Crumb Pie

Crust
¾ cups whole almonds
1 ½ cups gluten free rolled oats
¼ cup coconut oil
3 tablespoons maple syrup (or other liquid sweetener)
¼ teaspoon fine grain sea salt

Filling
4-5 medium apples
1/3 cup sugar
1 teaspoon cinnamon
½ teaspoon ground cloves
½ teaspoon nutmeg
2 tablespoons gluten free flour (such as gluten free baking mix)

Topping
½ cup gluten free baking mix
⅛ cup granulated sugar
⅛ cup brown sugar
¼ cup oats
¼ cup pecans, finely chopped
Dash of salt
¾ stick of butter, cut into pieces

For the crust
Blend ½ cup oats in a food processor until the consistency of flour. Remove to a separate bowl. Add the almonds to the food processor and blend until they resemble coarse sand. Add the oat flour, salt, oil, and syrup and blend until combined. Add the remaining one cup oats and blend until just combined. Pour into 9 inch pie pan and press into the sides. Set aside.

For the filling
Peel, core, and slice the apples. Mix in a large bowl with sugar, spices, and flour and toss until combined. Pour into prepared pie pan.

For the topping
Combine all ingredients into a medium bowl and mix with a pastry blender until the butter resembles small pebbles. Carefully pour over apples.

Cover the edges of the pie with foil. Bake at 400 degrees for about 45 minutes, or until the topping is browned and the apples are soft. Cool slightly before serving. 

Tuesday, December 6, 2011

Home Cooked Turkey Soup

This weekend I decided to host a second Thanksgiving with my friends from college.  Prior to the actual holiday, this seemed like a great idea, as if no one could ever have enough turkey and stuffing.  Fast forward nine days, two Thanksgiving meals and lots of leftovers later, I discovered that, while the turkey does get a little less exciting, any reason to get your friends together and share a meal is a good one.  

I roasted my first official turkey using Alton Brown's Good Eats Roast Turkey recipe, complete with brining bag and aromatics.  It turned out pretty well, if I do say so myself.


The next day, I was left with a whole lot of leftovers.  Not wanting to throw the turkey carcass (a really horrible word) away, I decided to make some soup with it.  Let me tell you, the aromas in my apartment on Sunday rivaled actual Thanksgiving day, and it was super easy.  A friend stopping by even said, "How homemaker-ish of you!" That's right, I'm a soccer mom living a single girl's life, and loving every minute of it.  

This soup embodies many of the tastes of Thanksgiving, with fresh sage, turkey, and lots of vegetables, but has the added bonus of being healthy.  You won't feel guilty after eating a big bowl, even if you have it for lunch three days in a row (which I may or may not have done this week, don't tell!) On cold winter days when it's dark by 4:30, turkey soup will warm you right up.  Plus, while it's simmering you'll have time to drink a mug of mulled wine and watch Home Alone, and who doesn't want to do that?

Here's how I made the soup:


First, put your turkey in a large stockpot, add an onion (quartered), 3 stalks of celery, and a bay leaf and cover with water.  Bring it to a boil and simmer for about 1 1/2 hours.  This isn't the prettiest part of the process, but it definitely smells the best. Remove the turkey from the stock pot and put in a bowl to cool.


The water in the stockpot is now delicious broth.  Pour it through a strainer or some cheesecloth to remove any remaining solids.  Set it aside and let it fully cool, letting it sit in the fridge if possible.  This will allow the fat to separate and float on top. Scoop it off and discard.


Once the turkey carcass has cooled enough so that you can touch it, remove all the meat from the bones, discarding everything else.  Slice it into bite sized pieces.


Back to the stockpot.  Heat 2 Tablespoons olive oil and saute one minced onion, the remaining celery (sliced), and all of the carrots (sliced).  Cook until tender, about 5-7 minutes.  Add a small handful of chopped sage leaves, along with 2 cloves of garlic, minced and cook for 1 more minute.


Add the broth, remaining bay leaf, turkey, rice or barley, and your vegetables.  I used a bag of frozen green beans and a bag of frozen corn, but you can use whatever veggies you prefer.  It's a great way to use up leftovers.  Bring everything to a boil and then simmer for 15 minutes.

Add salt, pepper and thyme to taste. So go ahead, grab a spoon and taste it!  Remember, you can always add more salt, but you can't take it out.  Simmer the soup for at least 30 minutes and up to several hours longer, depending on how much time you have.  A pot of soup on the stove makes for a pretty cozy Sunday, so I don't recommend that you rush.  

Serve piping hot in a pretty bowl and enjoy!


**Once I made this enormous pot of soup, I realized I might have solved the problem of what to do with the turkey carcass, but I had no idea what I was going to do with all this soup!  Luckily, soup is easily frozen and makes for great leftovers.  Once it cooled, I poured the extra soup into some Ziploc bags and froze flat in my freezer.  That way, I can stack them easily and they won't take up too much space. 

Home Cooked Turkey Soup
Adapted from The Food Network

1 leftover turkey carcass
1 onion, quartered, plus 1 onion, minced
1 bunch celery (3 whole and remaining sliced)
1 lb carrots, sliced
2 bay leaves
2 garlic cloves, minced
2 tablespoons olive oil
1 small handful fresh sage leaves, chopped (about 10-15 leaves)
3 cups leftover or frozen vegetables of your choice
1-2 cups rice or barley
1-2 teaspoons thyme (to taste)
Salt, pepper to taste

1. Put a leftover turkey carcass (with some meat still on the bones) in a large stock pot and cover with water.  Add one onion, quartered, 3 stalks of celery and 1 bay leaf. Bring to a boil.
2. Simmer the turkey for about 1 1/2 hours. Remove the turkey to a large bowl and let cool.  Through a strainer or cheesecloth, strain the water, which will now be broth, from the stock pot and set aside.  
3. In the stockpot, saute 1 minced onion, the remaining celery, sliced, and all of the carrots, sliced, in olive oil until softened, about 5-7 minutes.  Add the garlic and fresh sage and cook for 1 minute longer. 
4. Pour the broth into the stockpot and add the remaining bay leaf.  
5. Once the turkey is cool enough to touch, remove the meat from the bones, discarding everything else.  Slice the turkey into bite-sized pieces and add to stockpot.
6. Add vegetables to the stockpot and bring to a boil.  Simmer for 15 minutes and season with salt, pepper, and thyme to taste.
7. Simmer for 30 minutes to several hours.
8. Serve piping hot, preferably with a slice of crusty bread or crackers.

Note: Soup can be frozen for up to 6 months.

Wednesday, November 30, 2011

Silky Smooth Pumpkin Pie

I hope everyone had a yummy Thanksgiving.  If you're anything like me, you've had more than your fill of turkey, stuffing, cranberry sauce, and, of course, lots and lots of pie.  After one "Friendsgiving" here in DC, Thanksgiving in Connecticut, and one more "Friendsgiving" to go (which I get to host!), I'll have, in total, made this pie four times this year.  
CT Thanksgiving
And it's worth it every time!  This is no normal pumpkin pie.  This is the pumpkin pie that people who don't even like pumpkin pie will ask you to make over and over again.  This pie totes not just pumpkin, but candied yams.  Maple syrup, fresh ginger, and lots of cream combine for the perfect flavor combination that hint of cold weather, falling leaves, and, dare I say it, snow. 

My favorite way to make silky smooth pumpkin pie is from scratch.  As in, from a real pumpkin!  I'm just waiting for the day when I no longer live in a tiny studio apartment and have a yard in which to grow pumpkins.  Then this will really be from scratch.  Until then, Whole Foods will have to suffice.  (And when I'm crunched for time, canned pumpkin always works too.)  Make sure you get a sugar pumpkin.  Cut it in half and scoop out the seeds.  Save them for roasting later! Bake on a greased cookie sheet, cut side down, in a 350 degree oven for about an hour, or until they give way easily to a fork stuck through the skin.  


Once baked through, let the pumpkin cool just enough so that you can touch it.  Scoop the pulp out with a spoon and mash with a potato masher (or run through a food processor).  


Next, make the crust.  In a large mixing bowl, mix together flour and salt.  Slice the butter into pieces and cut into flour mixture with a pastry blender until it resembles coarse crumbs.  Make sure the butter is COLD!  It's also important to leave small bits of butter in the flour - this will help the crust be flaky.  All of this can be done in a food processor if you prefer.


Working in sections, gently mix in ice water with a fork until it forms a ball of dough.  Try not to overwork the dough.  On a well floured surface, roll the dough out with a rolling pin to form a circle large enough for your pie pan.


Transfer to pie pan, trim any excess from the edges, and fold the edges under.  Using your thumb and forefingers, crimp the edges.


Refrigerate dough for 15 minutes.  Remove from fridge, line with foil, and fill with pie weights (Who really has pie weights though?  Coins work just as well.  Multi-purpose laundry quarters!) Bake at 400 degrees for 15 minutes. Remove weights and foil and bake for 10 minutes longer, or until golden brown.  

Next, make the filling.  In a large mixing bowl, beat together eggs and egg yolks.  Whisk in the half & half and vanilla and set aside. 


In a large saucepan, mix together the pumpkin, yams, sugar, maple syrup, ginger, cinnamon, nutmeg, and salt.  I mash the yams with a fork before adding them.  Stirring frequently, bring to a sputtering boil over medium-high heat.  And by sputtering, I really mean bubbly!  Don't be shy about getting this concoction to really boil.  Continue to cook, stirring constantly, until the mixture is thick and shiny, about 15 minutes.


Once the pumpkin mixture is cooked, whisk in the cream mixture until combined.


Next, strain the mixture through a fine mesh strainer.  This seems tedious at first, but this is where the silky aspect of the pie comes in.  It's a little more work, but TOTALLY worth it!  

Once strained, re-whisk filling and pour into pre-baked crust.  Place pie on a cookie sheet and bake at 400 degrees for 10 minutes.  Turn oven down to 300 degrees and bake for 20-35 minutes longer, or until the edges are set.  

Here's one of the tricks to this pie: the center doesn't have to be set when you take it out of the oven, only the edges.  The pie continues to cook from the residual heat, so it's important to let it cool at room temperature for several hours.  I'd recommend 4-5 hours, but you can get away with fewer if you have to.


Serve with whipped cream and prepare yourself for the requests to make this pie for your friends to start pouring in!


Silky Smooth Pumpkin Pie
Filling recipe from smittenkitchen.com, where it was adapted from Cooks Illustrated
Crust recipe adapted from Better Homes and Gardens New Cook Book

Makes one 8" or 9" pie.

Crust 
1 1/4 cups flour
1/2 teaspoon salt
1/3 cup COLD butter
4-6 Tablespoons cold water


Filling
2 cups half and half (or 1 cup heavy cream and 1 cup whole milk)
3 eggs plus 2 egg yolks
1 teaspoon vanilla extract
2 cups pumpkin puree* (or 1 15-ounce can) 
1 cup drained candied yams from 15-ounce can (regular canned yams can be substituted)
3/4 cup sugar
1/4 cup maple syrup
2 teaspoons grated fresh ginger 
1/2 teaspoon ground cinnamon
1/2 teaspoon ground nutmeg
1 teaspoon salt


For the Pumpkin Puree

Bake a sugar (pie) pumpkin:
  • Cut the pumpkin in half and scoop out the seeds
  • Bake cut side down on a greased baking sheet at 350 degrees for 45-60 minutes, or until a fork can be stuck through the pumpkin easily
  • Cool slightly, then scoop out pulp 
  • Mash pulp with a potato masher or run though a food processor until smooth
For the Crust
  • Mix together flour and salt in large mixing bowl
  • With a pastry blender, cut in butter until it resembles coarse crumbs (leaving clumps of butter)
  • Add 3 Tablespoons cold water and mix gently
  • One Tablespoon at a time, mix in additional cold water until the dough is moistened and forms a ball
  • On a well floured surface, roll the dough out with a rolling pin to form a circle big enough to fit into pie pan
  • Transfer to pie pan, trim the edges, fold extra dough under, and crimp the edges with thumb and forefingers or a fork
  • Refrigerate for 15 minutes
  • Remove dough from refrigerator, line with foil, and fill with pie weights (or coins)
  • Bake at 400 degrees for 15 minutes. Remove foil and weights and bake for 10 more minutes, or until golden brown
For the Filling
  • In a medium mixing bowl, beat eggs and egg yolks.  Whisk in half and half (or cream and milk) and vanilla. Set aside.
  • In a large saucepan, mix together pumpkin, yams (mash with a fork prior to adding), sugar, maple syrup, ginger, cinnamon, nutmeg, and salt.  
  • Cook over medium heat until it comes to a sputtering boil, stirring frequently.
  • Continue to simmer, stirring constantly, for 10-15 minutes, until the mixture is thickened and shiny.
  • Remove from heat and stir in egg mixture.
  • Pour combined mixture through a fine mesh strainer.
  • Re-mix strained mixture and pour into pre-baked pie crust.
  • Bake pie on a cookie sheet at 400 degrees for 10 minutes.
  • Reduce heat to 300 degrees and bake for 20-35 minutes longer, until edges are set.
  • Cool at room temperature for several hours (pie continues to bake and sets as it cools).
  • Serve with fresh whipped cream.
 
site design by designer blogs